The UI Layer: UI, Presenter, and View Model
Now that you've gotten an overview of how Clean Framework projects are typically structured, lets discuss the UI layer in more detail.

Understanding the UI Layer
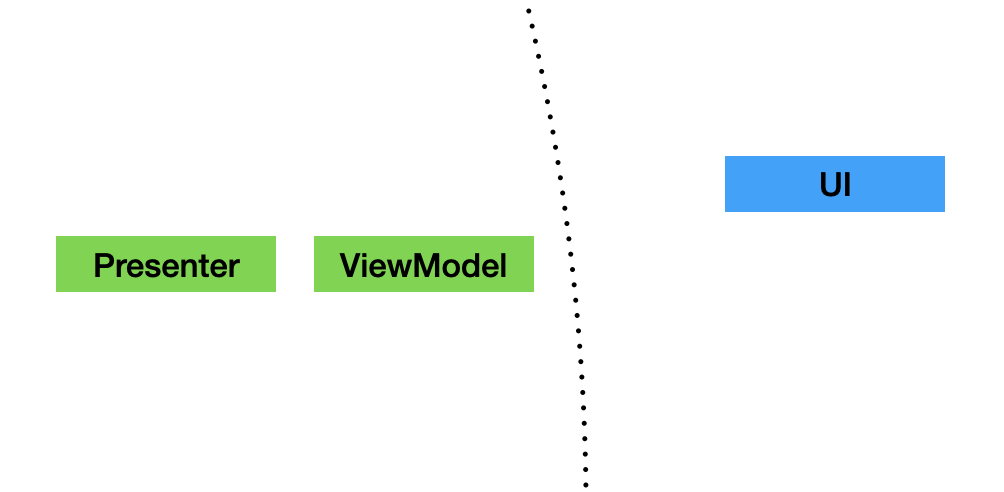
The UI Layer in Clean Framework is the outermost layer of the app architecture, dealing with everything you see on the screen - think widgets and screen layouts. It's designed to separate the UI logic from the backend processes and business logic as much as possible.
Components of the UI Layer
- UI: This is where the widgets that define the appearance of your app reside.
- Presenter: A bridge between the UI and Domain layers; responsible for data digestion and exchange.
- View Model: Serves as a data container for the UI, receiving its data from the Presenter.
Stateless Over Stateful
We prefer to use Stateless Widgets whenever possible for UI components, in order to adhere to the principles of Clean Architecture. It's all about keeping the UI layer free of direct state management.
View Models and Presenters
- View Models: View Models are designed to be immutable and straightforward, generally only containing strings and necessary data for the UI.
- Presenters: In charge of processing and translating data from the domain layer into a format the UI can use, by creating and updating View Models. All data formatting, parsing, or other modifications done for the UI should be handled by the Presenter.
Building a Pokémon App: A Practical Example
Now, let’s put this into practice by building an app that displays Pokémon data. Business logic-wise, our app will fetch data from a service and display it on a screen.
For this example, we'll be using PokéAPI's REST API.
You can find the source code for the project, as well as a GraphQL version here:
- example_rest (using the PokéAPI REST v2 API)
- example_graphql (using the PokéAPI GraphQL v1 beta API with the
clean_framework_graphqlpackage)
The Feature Requirements
Once you've set up your feature folder, you might be eager to dive into adding Widgets. The great thing about this framework is its flexibility; you can start crafting components without needing to worry about dependencies like databases, services, or caches. That's because these concerns are handled by other layers.
A good first step in developing a new feature is to figure out how many UI elements you'll need to bring your idea to life. This approach keeps things straightforward and focused.
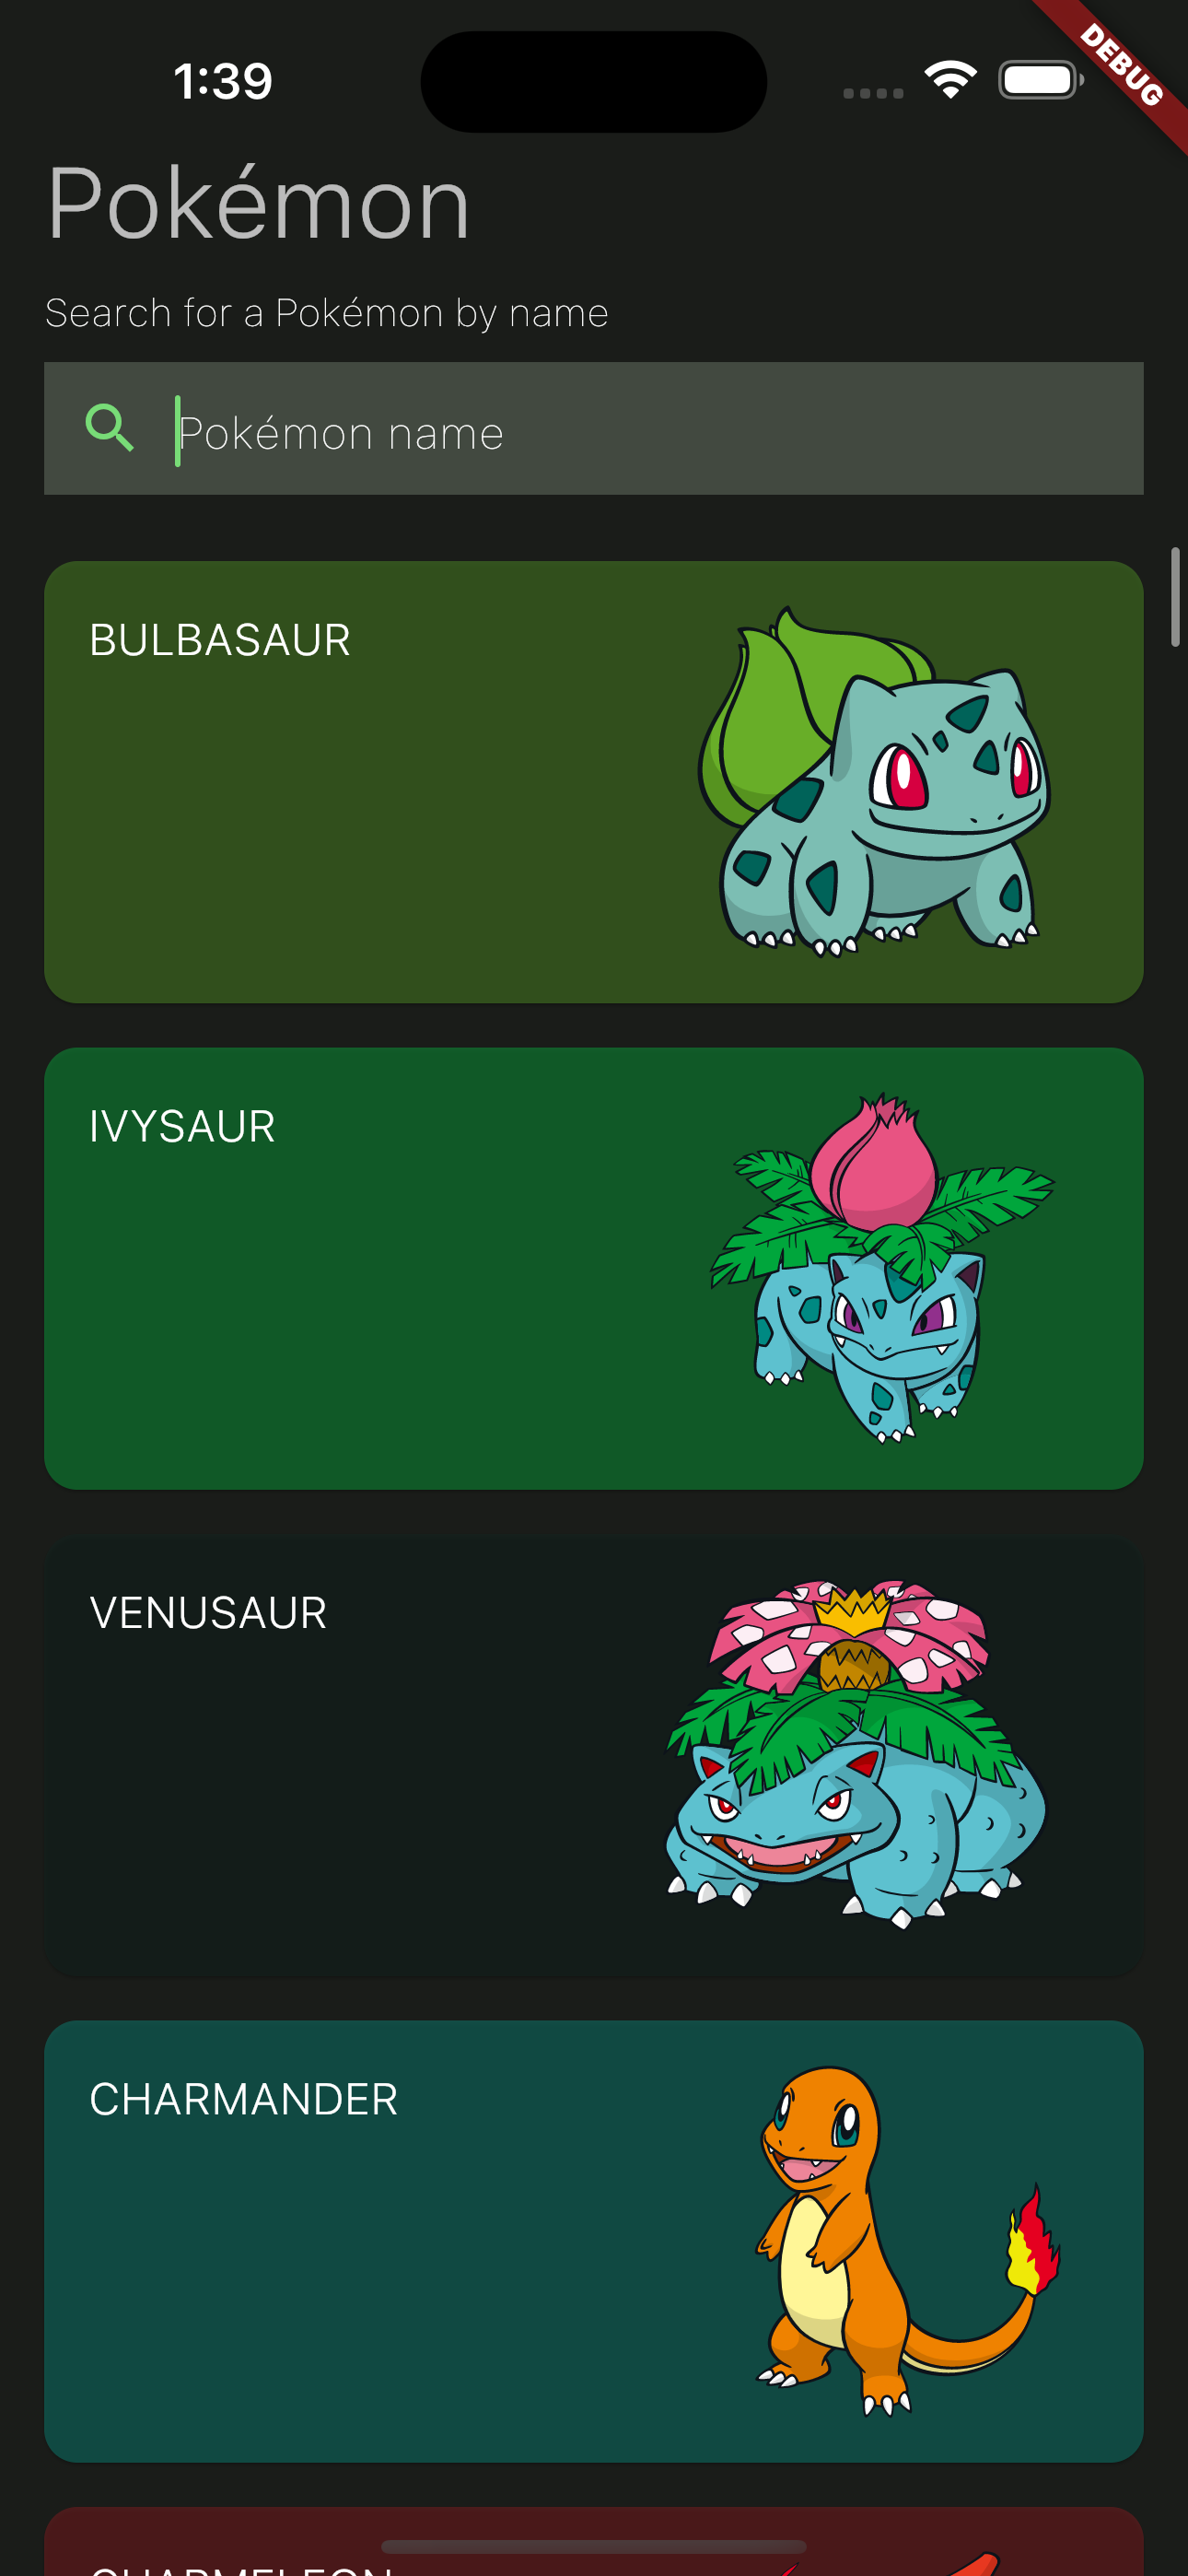
Our app will display a list of Pokémon and include a search functionality. Here’s a simple requirement outlined in Gherkin:
Given I have navigated to the Home feature
Then I will see a list of Pokemon
And I will see a search bar
When I type a Pokemon name on the search bar
Then I will see the list of Pokemon filtered by the search term
Step 1: Create the View Model
First, we’ll define the HomeViewModel with properties such as a list of Pokémon, loading states, and user interaction callbacks: any data that is required by the UI of the feature.
File: lib/features/home/presentation/home_view_model.dart
class HomeViewModel extends ViewModel {
  const HomeViewModel({
    required this.pokemons,
    required this.isLoading,
    required this.hasFailedLoading,
    required this.onRetry,
    required this.onRefresh,
    required this.onSearch,
  });

  final List<PokemonViewModel> pokemons;
  final bool isLoading;
  final bool hasFailedLoading;

  final VoidCallback onRetry;
  final AsyncCallback onRefresh;
  final ValueChanged<String> onSearch;

  @override
  List<Object?> get props => [pokemons, isLoading, hasFailedLoading];
}

class PokemonViewModel extends ViewModel {
  const PokemonViewModel({
    required this.name,
    required this.imageUrl,
  });

  final String name;
  final String imageUrl;

  @override
  List<Object?> get props => [name, imageUrl];
}
Step 2: Set up the Presenter
The Presenter listens to Use Case/Domain models and creates the View Model. But before we can create our Presenter, we need to set up the basic structure of the domain layer: the Entity, DomainModel, and UseCase classes. We'll cover these in greater depth later, but for now, we just need the skeleton of the domain layer.
File: lib/features/home/domain/home_entity.dart
class HomeEntity extends Entity {
  @override
  List<Object?> get props => [];
}
File: lib/features/home/domain/home_domain_models.dart
class HomeDomainToUIModel extends DomainModel {
  @override
  List<Object?> get props => [];
}
File: lib/features/home/domain/home_use_case.dart
class HomeUseCase extends UseCase<HomeEntity> {
  HomeUseCase() : super(
    entity: HomeEntity(),
    transformers: [
      DomainModelTransformer.from((_) => HomeDomainToUIModel()),
    ],
  );
}
Now that our domain layer has been created, let's add a provider so we can interact with our UseCase from the Presenter:
File: lib/providers.dart
final homeUseCaseProvider = UseCaseProvider(HomeUseCase.new);
Finally, we have all the components needed to create the Presenter class. Putting it all together, the Presenter looks like this:
File: lib/features/home/presentation/home_presenter.dart
class HomePresenter extends Presenter<HomeViewModel, HomeDomainToUIModel, HomeUseCase> {
  HomePresenter({
    super.key,
    required super.builder,
  }) : super(provider: homeUseCaseProvider);

  @override
  HomeViewModel createViewModel(HomeUseCase useCase, HomeDomainToUIModel domainModel) {
    const spriteBaseUrl = 'https://raw.githubusercontent.com/PokeAPI/sprites/master/sprites/pokemon/other/dream-world';

    return HomeViewModel(
      pokemons: const [
        PokemonViewModel(name: 'Bulbasaur', imageUrl: '$spriteBaseUrl/1.svg'),
        PokemonViewModel(name: 'Charmander', imageUrl: '$spriteBaseUrl/4.svg'),
        PokemonViewModel(name: 'Squirtle', imageUrl: '$spriteBaseUrl/7.svg'),
        PokemonViewModel(name: 'Pikachu', imageUrl: '$spriteBaseUrl/25.svg'),
      ],
      onSearch: (query) {},
      onRefresh: () async {},
      onRetry: () {},
      isLoading: false,
      hasFailedLoading: false,
    );
  }
}
As you can see, our provider (homeUseCaseProvider) is passed to the Presenter in our constructor. We can then start receiving state changes from the domain layer via the ViewModel createViewModel(UseCase, DomainModel) function. This is where data is received from the UseCase (via the DomainModel) and where the ViewModel is updated for the UI. Assuming any new or modified data is needed by the UI, such as (for example) the case of displaying a dialog box with variable contents to the user, the logic for that would be handled and the resulting data passed into the ViewModel here as well. As stated previously, the Domain layer will be covered in more detail later, but for now, here is a brief overview of the flow of data from the Domain layer to the UI:
UseCase (buiness logic) → DomainModel (data) → Presenter (createViewModel()) → ViewModel (data) → UI (build()).
It may seem strange that we would be moving data into and out of multiple different containers. Why not just send it straight from the Use Case to the UI? Well, one of the main goals of Clean Architecture, and consequently, Clean Framework, is to maintain a good separation of concerns. By allowing the UI to directly interact with the Use Case, the boundary between UI logic and the business logic of the application would be less clear, and increase the risk of developing bad dependency cycles. This can make code harder to read, debug, and maintain. It may not seem that important for small applications, however, as the size of the application increases along with the amount of code, this separation becomes more and more crucial.
Our goal in having multiple data containers that can sometimes contain the same data (Entity, DomainModel, ViewModel, etc.) is to avoid mixing responsibilities and have each class perform one clearly defined task (ex. DomainModel: transfer data out of Use Case, ViewModel: hold data and callbacks required by the UI.)
Now that all of the prerequisites have been created, we're ready to move on to adding the UI itself.
Step 3: Build the UI
This is where we start adding widgets to create the visual components of our app.
Our UI class is going to be laid out like this:
File: lib/features/home/presentation/home_ui.dart
class HomeUI extends UI<HomeViewModel> {
    HomeUI({super.key});

    @override
    HomePresenter create(PresenterBuilder<HomeViewModel> builder) {
        return HomePresenter(builder: builder);
    }

    @override
    Widget build(BuildContext context, HomeViewModel viewModel){
        return Scaffold(
            child: const Text('Your UI Here!'),
        );
    }
}
In any Clean Framework UI, two functions are needed (assuming V is your ViewModel): the Presenter create(PresenterBuilder<V>) function, which creates our presenter, and Widget build(BuildContext, V) which builds the UI with the widgets we want, providing them with the ViewModel containing presentation-ready data. In summary, all of the pure UI logic goes in the build function within the UI class.
Since a screen with a single line of text isn't very interesting, let's add a little more detail. Here is our completed UI that makes use of our data and reflects the design we laid out at the beginning of this section:
File: lib/features/home/presentation/home_ui.dart
class HomeUI extends UI<HomeViewModel> {
  HomeUI({super.key});

  @override
  HomePresenter create(PresenterBuilder<HomeViewModel> builder) {
    return HomePresenter(builder: builder);
  }

  @override
  Widget build(BuildContext context, HomeViewModel viewModel) {
    final textTheme = Theme.of(context).textTheme;

    Widget child;
    if (viewModel.isLoading) {
      child = const Center(child: CircularProgressIndicator());
    } else if (viewModel.hasFailedLoading) {
      child = _LoadingFailed(onRetry: viewModel.onRetry);
    } else {
      child = RefreshIndicator(
        onRefresh: viewModel.onRefresh,
        child: Scrollbar(
          thumbVisibility: true,
          child: ListView.builder(
            prototypeItem: const SizedBox(height: 176), // 160 + 16
            padding: const EdgeInsets.symmetric(horizontal: 16),
            itemBuilder: (context, index) {
              final pokemon = viewModel.pokemons[index];

              return PokemonCard(
                key: ValueKey(pokemon.name),
                imageUrl: pokemon.imageUrl,
                name: pokemon.name,
                heroTag: pokemon.name,
                onTap: () { /*TODO: Navigate to detail page*/ },
              );
            },
            itemCount: viewModel.pokemons.length,
          ),
        ),
      );
    }

    return Scaffold(
      appBar: AppBar(
        title: const Text('Pokémon'),
        centerTitle: false,
        titleTextStyle: textTheme.displaySmall!.copyWith(
          fontWeight: FontWeight.w300,
        ),
        bottom: viewModel.isLoading || viewModel.hasFailedLoading
            ? null
            : PokemonSearchField(onChanged: viewModel.onSearch),
      ),
      body: child,
    );
  }
}

class _LoadingFailed extends StatelessWidget {
  const _LoadingFailed({required this.onRetry});

  final VoidCallback onRetry;

  @override
  Widget build(BuildContext context) {
    return Center(
      child: Column(
        children: [
          Text(
            'Oops, loading failed.',
            style: Theme.of(context).textTheme.displaySmall,
          ),
          const SizedBox(height: 24),
          OutlinedButton(
            onPressed: onRetry,
            child: const Text('Help Flareon, find her friends'),
          ),
          const SizedBox(height: 64),
        ],
      ),
    );
  }
}
Note the use of the View Model in the build method: all the data is readily available to the UI, and the business logic has been kept completely separate from the UI logic itself. That's the goal here: cleanliness, modularity, and readability!
Launching the App
In main.dart, we now just need to set up our Flutter app with an AppProviderScope as the top-level widget, and HomeUI as the starting point by passing it into the home parameter of the AppProviderScope.
Note: Remember to use
AppProviderScopeas the top-level widget! It holds all of the state providers for the app.
File: lib/main.dart
void main() {
  runApp(const MyApp());
}

class MyApp extends StatelessWidget {
  const MyApp({super.key});

  @override
  Widget build(BuildContext context) {
    return AppProviderScope(
      child: MaterialApp(
        title: 'Pokemon',
        theme: ThemeData.from(
          colorScheme: ColorScheme.fromSeed(seedColor: Colors.red),
          useMaterial3: true,
        ),
        home: HomeUI(),
      ),
    );
  }
}
Congratulations, you're finished implementing the UI layer! The app should now run perfectly fine using the static data we gave to our view model.
By now, you've likely seen how Clean Framework simplifies UI development. You don't have to wait for the Domain Layer to be complete before starting on the UI. This means you can work alongside another developer focusing on the Domain Layer, making your development process more efficient and collaborative.
What's really great about this approach is how it streamlines creating MVPs and prototypes. You can quickly get a working version ready for stakeholder and QA team reviews, which helps in gathering early feedback. This not only speeds up the development cycle but also reduces a lot of potential stress for the development team.
In the next section, we'll be going over the Domain layer and begin adding business logic to our Pokémon app.
